In this blog were going to look at producing a spiral staircase in SOLIDWORKS 2018 vs the older (SOLIDWORKS 2017 and below) way of doing things. We’ll also look at how a new ‘Rotate Instances’ option inside the linear component pattern tool can help with this task.
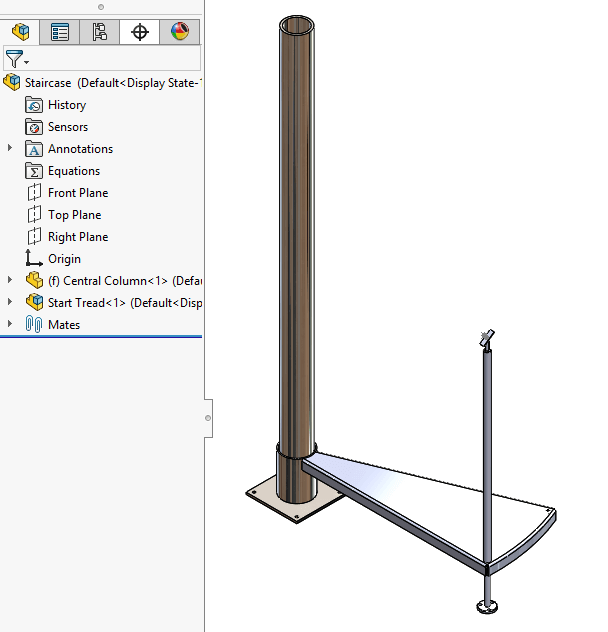
The scenario: All the models required are already created and the assembly has already been started. Within the assembly we have our central core and the start tread already placed and fully defined:
Our subsequent treads have been modelled as a sub assembly ready to insert:
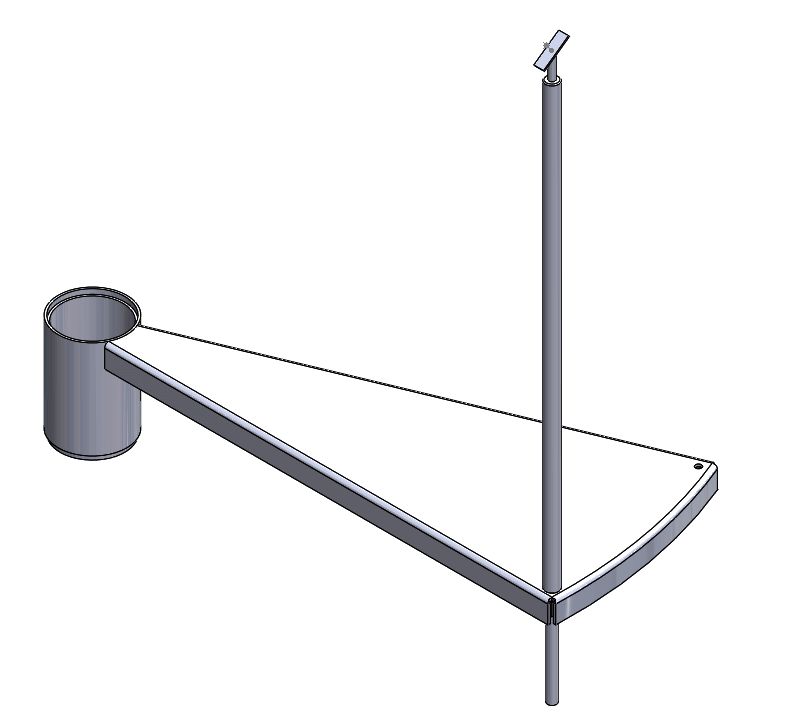
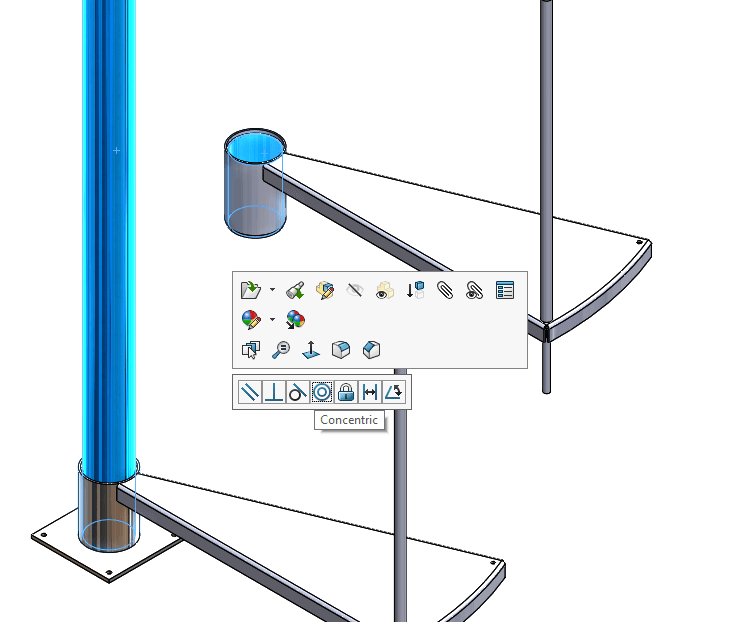
All we need to do here is add the tread assembly to our top-level assembly. We’ll mate the cylindrical face of the tread core to the shaft of the central column:
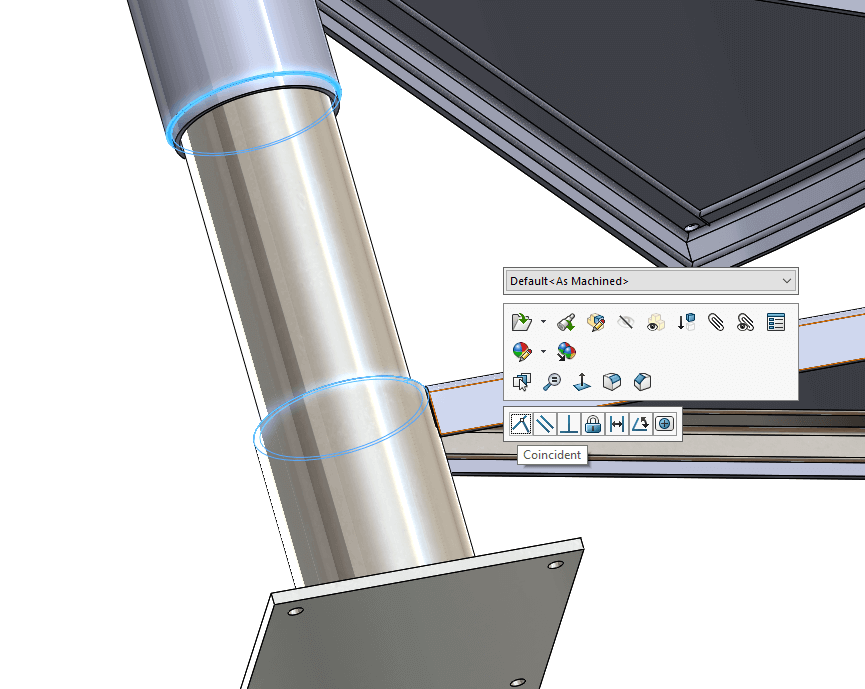
Then mate the underside face of the core of the new tread to the top face of the core on the start tread:
Finally, we need to mate the cylindrical face on the handrail spacer to the hole on the tread:
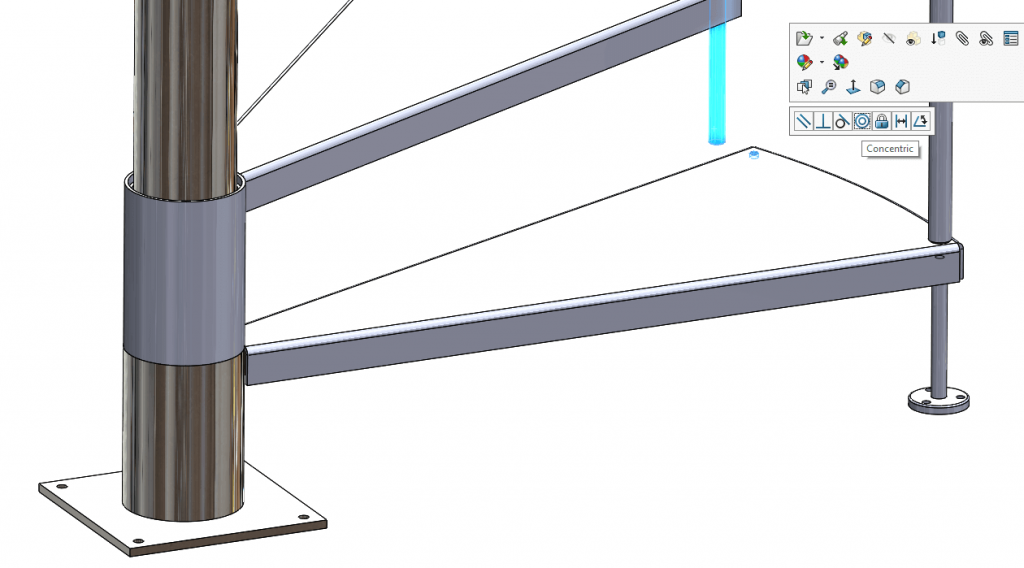
Everything up to this stage in will be the same in both SOLIDWORKS 2017 & 2018.
To complete the job in SOLIDWORKS 2017, we would add in the next tread assembly, create the same mates between the central column and its preceding tread, and effectively repeat the process for every single tread we would add.
So, if we were adding a further 7 instances of the tread assembly, we’d use Insert Components 7 times and need to create 21 mates (3 per component) in total.
We could potentially reduce the amount of operations using tools such as copy with mates.
So how do we speed things up in SOLIDWORKS 2018?
Usually when we see the same parts repeated in an assembly it is possible to pattern these components. However, given the nature of the geometry of a spiral staircase, it doesn’t lend itself to the various pattern types that were on offer in SOLIDWORKS 2017 and previous, as each instance of the tread is repeated linearly and is also rotating.
However, within the Linear component pattern tool in SOLIDWORKS 2018, it is now possible to ‘Rotate Instances’:
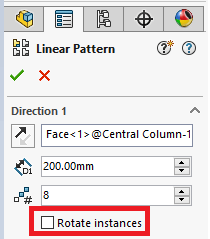
So, to complete our staircase, we would choose to pattern the tread assembly, the distance that we will pattern the tread in this case will be 200mm (which matches the rise height) and we want a total of 8 instances.
We then toggle the ‘Rotate Instances’ tick box on. We’ll then be prompted to select an axis to rotate the instances about. We select the cylindrical face of the central column and, finally, key in a value of 22.5 degrees as the rotation value.
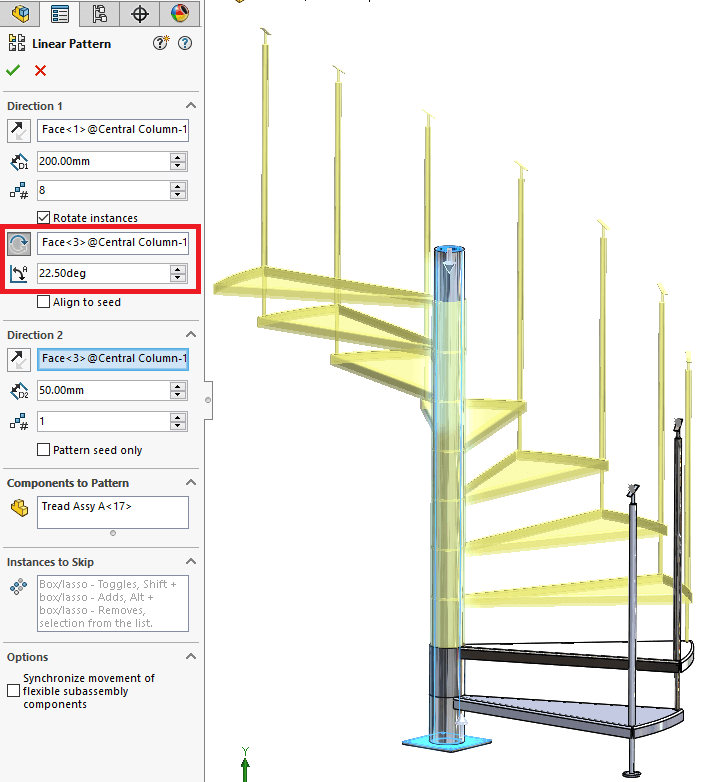
And that’s it! Fast and simple. We use insert components zero times and create zero mates. And because we’ve used the pattern tool, we’ll have access to all the pattern dimensions for equations and we can start to build intelligence and automation in to the spiral staircase – another great productivity enhancement in SOLIDWORKS 2018!
We hope you found that useful.
Have you seen our blog archive where we have posted plenty of helpful articles? We also have a fantastic video library filled with easy-to-follow videos on a number of topics inspired by other SOLIDWORKS users – take a look. Also, don’t forget to follow Innova Systems on Twitter for daily bite size SOLIDWORKS tips, tricks and videos.


