When switching your SOLIDWORKS License from machine-based activation to SolidNetWork Licensing you’ll need to update your current SOLIDWORKS installation. This step-by-step guide will take you through the process for making this switch.
For “Server Side” installs, please see our accompanying blog on installing the SNL manager here.
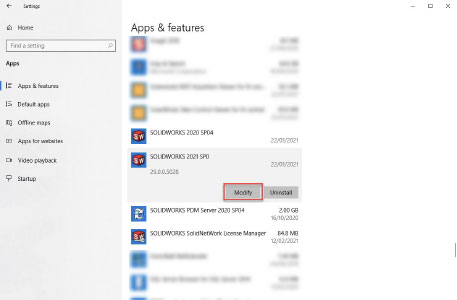
Firstly, go to Apps and Features in Windows, find ‘SOLIDWORKS’ and click ‘Modify’.
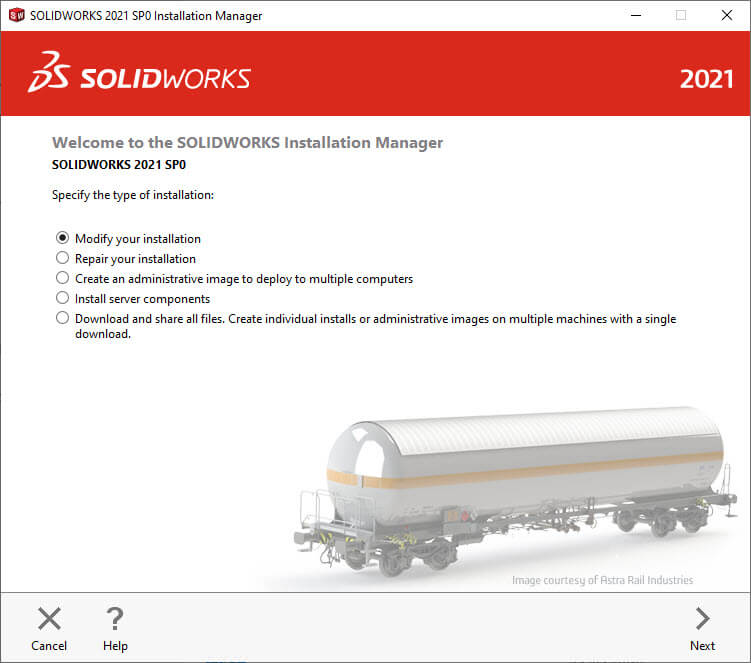
After the installation manager launches, choose the modify option, and Click ‘Next >‘
On the next screen you can enter your network serial number.
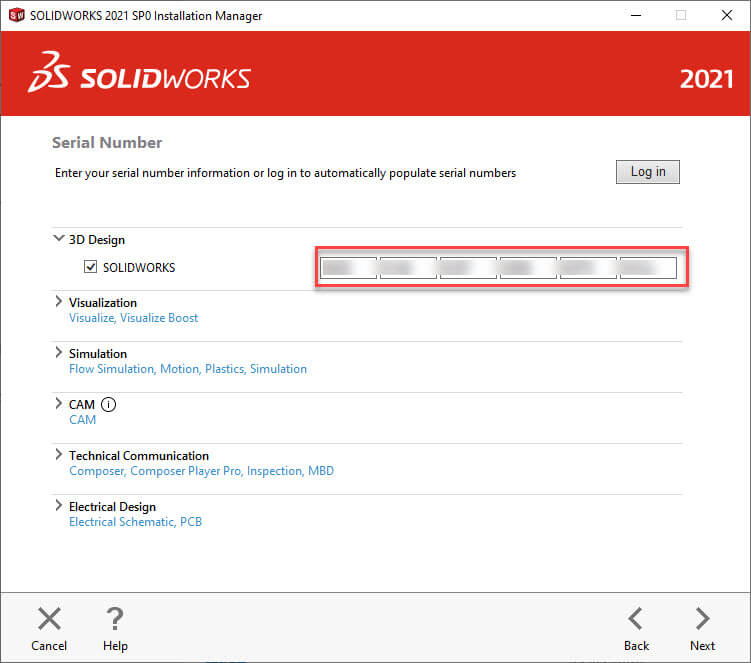
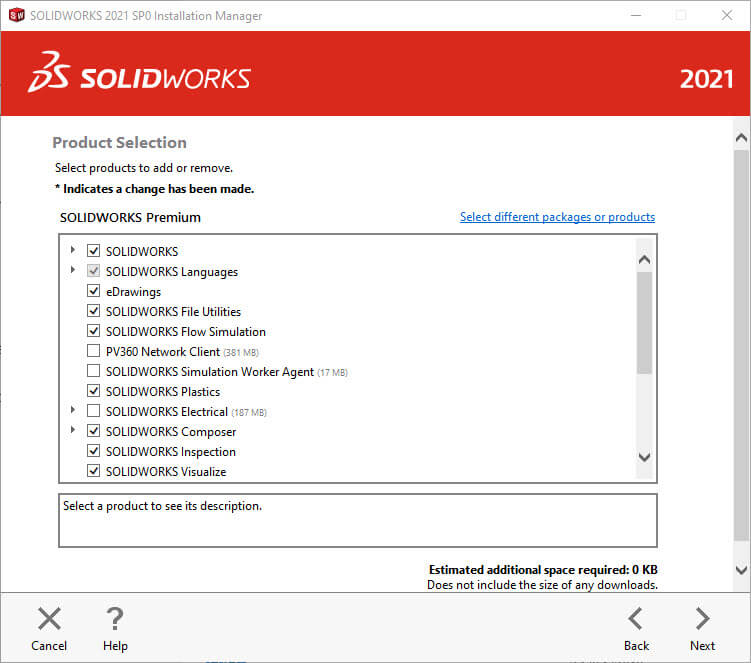
The next screen you will see is likely to be the product selection page. If you wish to use more areas of the software, you can choose to install them at this point. If you have the space we recommend that you install every product you have access to under your network license. In this case our Network Serial number contains a number of additional SOLIDWORKS software like SOLIDWORKS plastics, and SOLIDWORKS Flow Simulation. If you’re unsure what your serial number includes, please speak to your Local SOLIDWORKS VAR – Innova Systems customers can get in touch with us here.
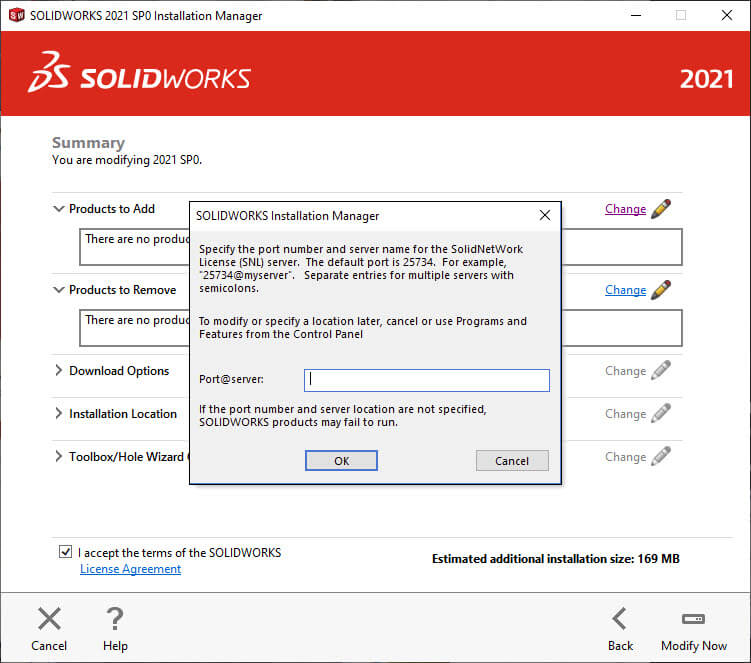
On the next screen is an installation summary. If you click ‘Modify Now‘ the installation manager will ask you for the location of the server. This will be the port used for connection (25734), the ‘@’ symbol and the Name or IP address of the PC you are connecting to, in order to obtain your SOLIDWORKS network licenses. e.g. 25734@MyServer.
Once the installation finishes you’re done!
We hope you found that useful!
Have you seen our blog archive where we have posted plenty of helpful articles? We also have a fantastic video library filled with easy-to-follow videos on a number of topics inspired by other SOLIDWORKS users – take a look. Also, don’t forget to follow Innova Systems on Twitter for bite-size SOLIDWORKS tips, tricks, and videos.


