The PDM Admin Tool
On the client machine, an application called the SOLIDWORKS PDM Administration Tool (more commonly known as the Admin tool) will have been automatically installed. The easiest way to find this is to use Windows explorer to search “Admin…” – The application name appears as ‘Administration’.
This is used to manage all administrative tasks for your SOLIDWORKS PDM vault. This obviously requires sufficient privileges for the various areas within. Limited access for a user to change their password for example is provided automatically.
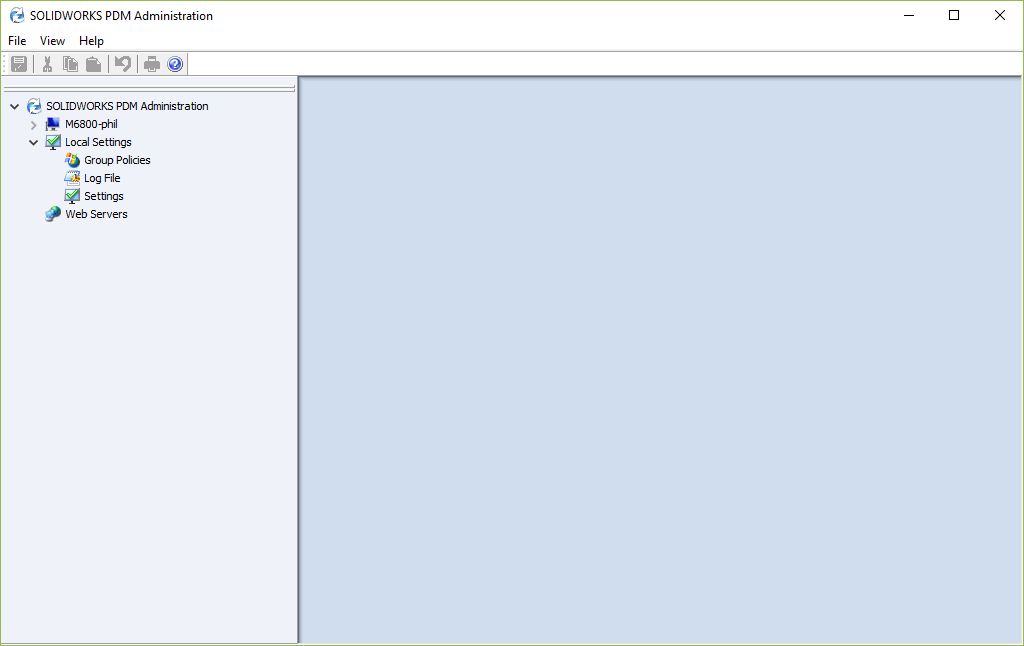
For the purpose of this blog, we are solely focusing on the creation of new users and groups within this tool.
Users
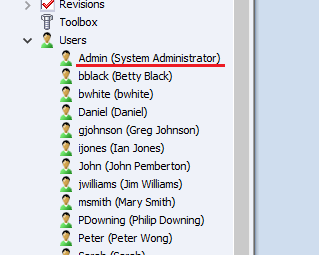
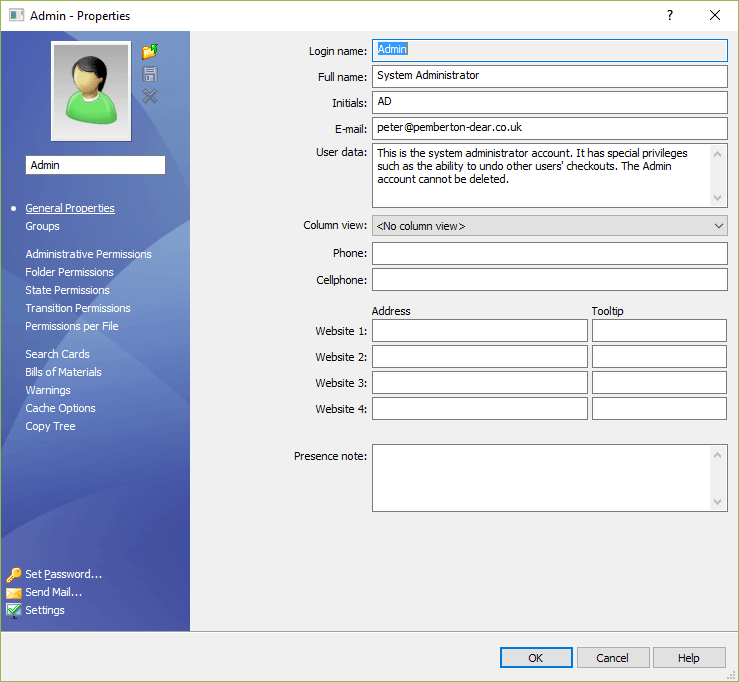
Creation of new users is a simple process. Browse to the ‘Users’ dropdown as seen in Image 2, right click and select “New User” (image 3). You are then presented with another window (Image 4), where you can create a new user via the button as highlighted, filling in all the details as required in the boxes below it.
Tip: You can copy permissions and settings from another user via the selection on the bottom of Image 4. This is a great time saver!
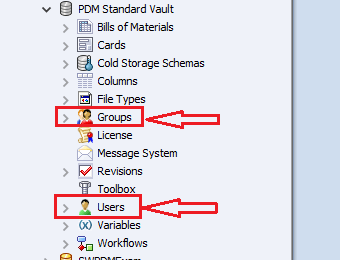
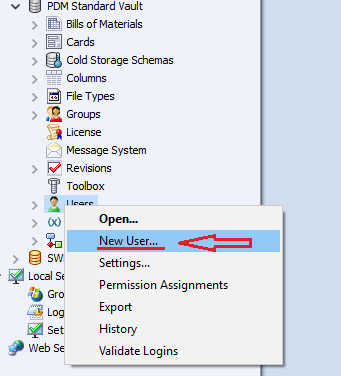
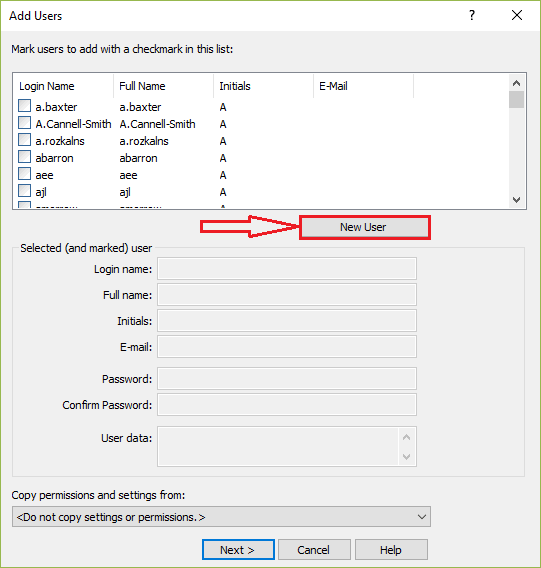
Follow this process until all of the users have been created. Once created they can then be assigned various permissions relating to states, folders, transitions, files and various other things by either selecting next or selecting the user from the users list as seen in Images 5 and 6. The Images shown have all been taken from a PDM Standard vault. PDM Professional has additional functionality – for example you are able to link the users to their Windows active directory.
Tip: At this stage, it’s a good time to point out that it’s easier to control user permissions via groups rather than as individuals. It’s quicker to create and also to problem-solve should an issue arise relating to permissions!
Groups
The next task is group creation (this can be done first if required). Typical examples of groups include Engineers, Managers, Approvers, and Viewers.
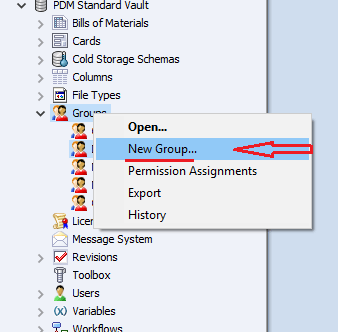
To begin, Right-click on Groups and select ‘New Group…’ as seen below:
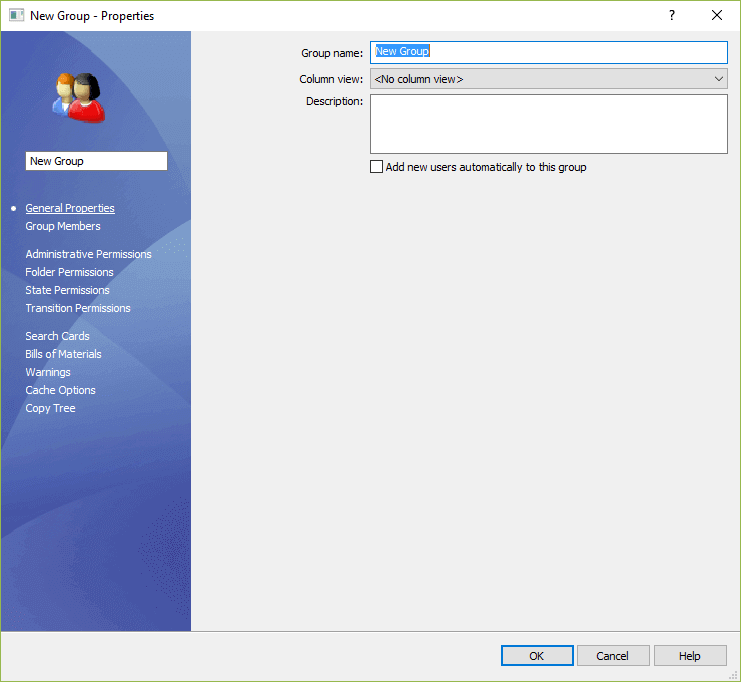
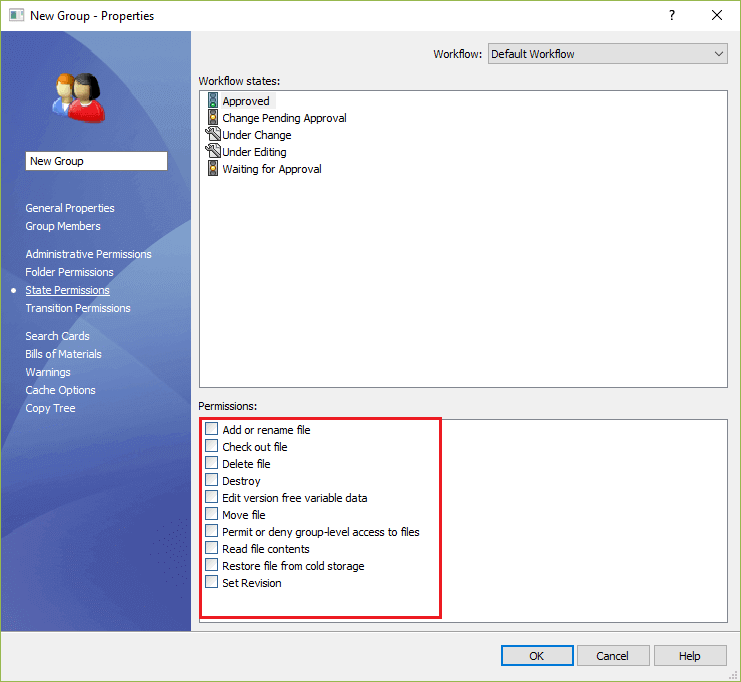
Another window appears allowing you to name the group, assign the group members and all of the relevant permissions. Users can be present in more than one group and, if this is the case, remember that permissions ‘stack’. So permissions from one group add on to the permissions of another group for that particular user.
Settings & Permissions
The difference between settings and permissions can sometimes be confusing. To explain it as simply as possible; when a group is assigned a permission, all users inherit that permission as long as they are part of that group. However, if a setting is assigned to the group, all users in the group are assigned that setting and the setting is maintained even if they leave the group. This is a useful way to assign settings to multiple users at once.
We hope you found that useful!
Have you seen our blog archive where we have posted plenty of helpful SOLIDWORKS tutorials? We also have a fantastic video library filled with easy-to-follow videos on a number of topics inspired by other SOLIDWORKS users – take a look. Also, don’t forget to follow Innova Systems on twitter for daily bite size SOLIDWORKS tips, tricks and videos.


