If you’re using SOLIDWORKS PDM, you’ll sometimes find that the file you need to use is checked out by another user leaving you without access. If you’re lucky that user is available and can make the file available by checking it in themselves, but there might be a time when they’ve checked the file out and then gone on holiday!
So, what can we do about this? Well, prior to SOLIDWORKS PDM 2019 you’d have had to talk to your PDM administrator who could either log on to the user’s machine and check the file back in or do an “undo check-out” from any machine. While it’s not a lengthy process it can be frustrating for both yourself and the administrator.
New to SOLIDWORKS PDM 2019 is a permission that can be given allowing a user to do an “undo check-out” of another user’s files. This permission can be found in the ‘Administrative Permissions’ section of each users (or groups) properties as shown below:
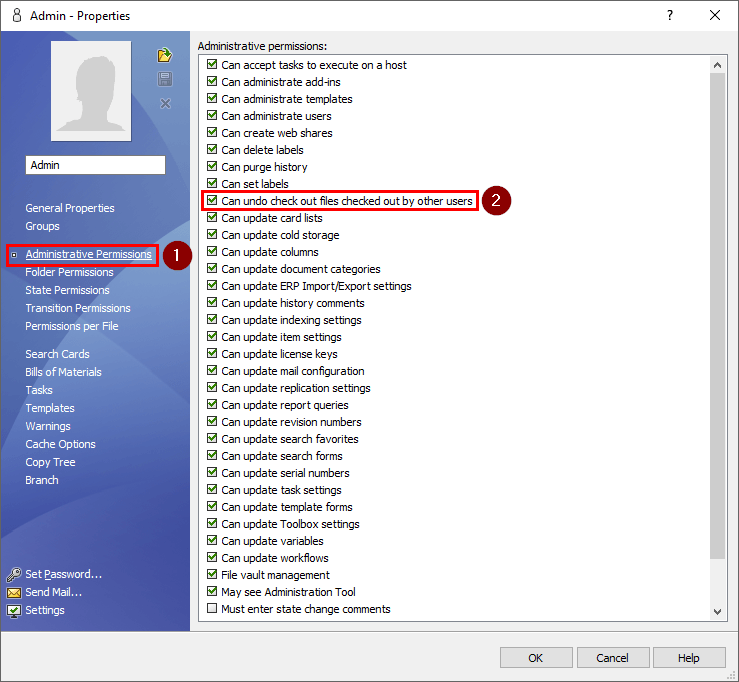
Now before you give this permission to everyone please be aware that this does allow a user to throw away another users work and therefore should only be used if the person who has checked the file out cannot be reached and there is a level of urgency around the work.
If you’re upgrading from PDM 2018 or earlier, you can rest easy that this permission is not turned on by default.
How to do it in Workgroup PDM
A common situation many users of Workgroup PDM find themselves in is where another user has taken ownership of a file and is away from their company and therefore unable to release ownership. Another user would like to modify that file, but is unable to check it out as it is already owned by that user.
The following message will be displayed, advising the user that “This document is already owned by User A”…
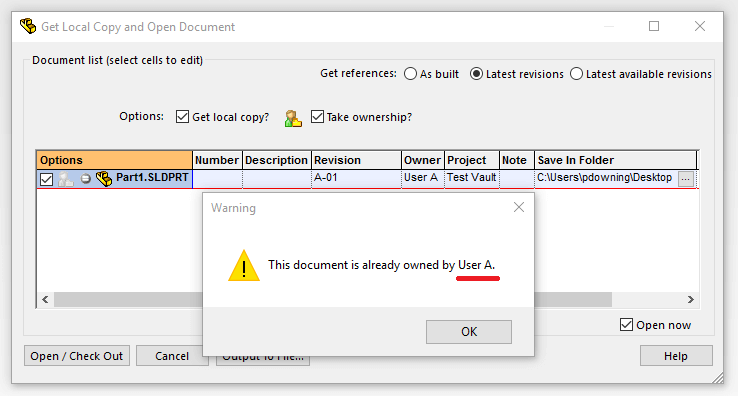
You still have the ability to open the file, just not check it out or modify it, as it will be in a “Read-only” state. The ability to take ownership of the file is not permitted within the Workgroup PDM environment if it is already owned, the only way around it is to get the owner to release ownership of the file! Or is it…

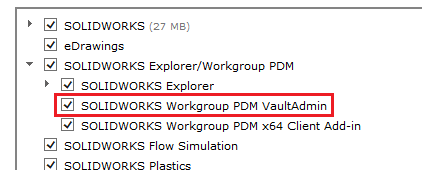
The other way of doing this is to use the “VaultAdmin tool”. If you do not have this application installed, ensure that it is ticked on within the SW Installation manager when installing SOLIDWORKS as seen below.
This tool enables the user to control everything from permissions, users & groups, revision scheme through to the lifecycle of their vault. Firstly log into the Vault admin tool. The only people allowed to log in must be Administrators, this can be seen in the upper right hand corner of the vault settings tab. By default the “pdmwadmin” is the only one allowed.
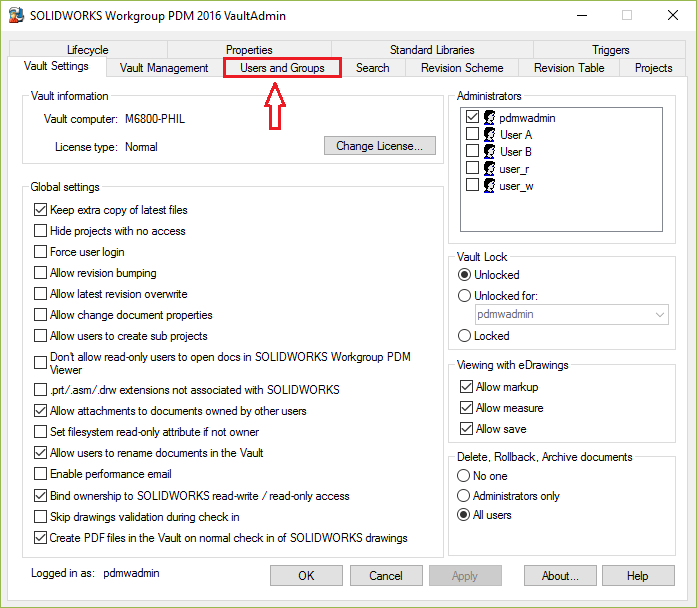
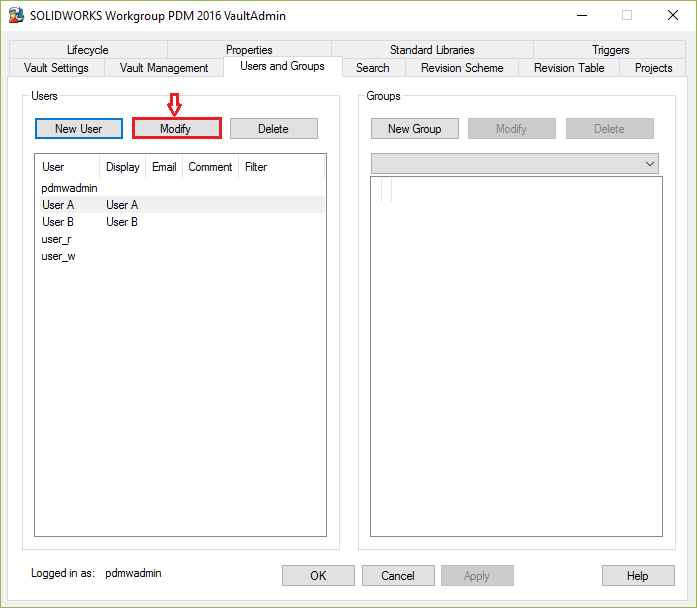
Browse to the “Users and Groups” tab, select the user that has ownership of the file and select the Modify box as shown here.
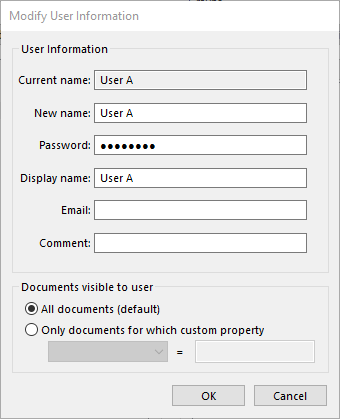
This then generates another window allowing you to change the password of that user, thus enabling you to log in to the vault as that user with the new password and release ownership of the file, in order to check it back in.
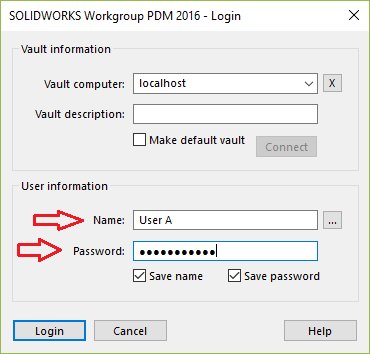
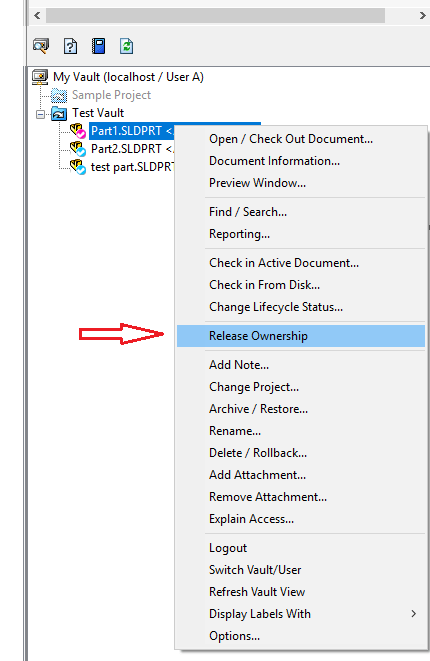
That’s it! The file is now able to be modified by any other user.
Just remember to tell the user what their new password is when they return…or not if you wish to teach them a lesson!
We hope you found that useful!
Have you seen our blog archive where we have posted plenty of helpful articles? We also have a fantastic video library filled with easy-to-follow videos on a number of topics inspired by other SOLIDWORKS users – take a look. Also, don’t forget to follow Innova Systems on twitter for daily bite size SOLIDWORKS tips, tricks and videos.


