If your SOLIDWORKS PDM Vault is missing following reinstallation, it’ll be because it hasn’t been connected to your vault in order to create a local view. I’ll show you how to access your PDM vault by covering the following three areas:
- How to create a local view using the View Setup tool
- How to log in
- How to navigate within the PDM Vault
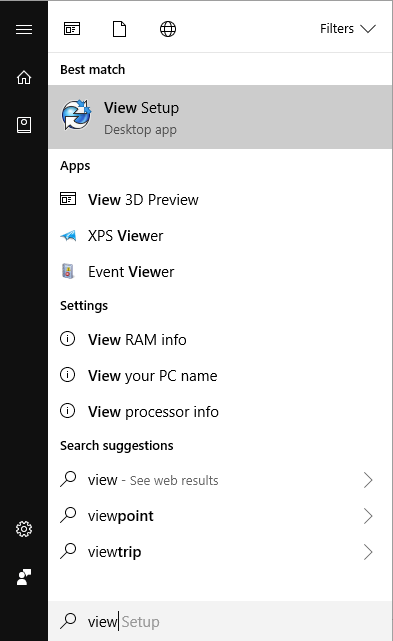
After the SOLIDWORKS PDM client has been installed you must create a local view so that you can log into the vault. To do this start the View Setup tool. It can be found by searching the start menu for ‘View’, or by clicking: Start > SOLIDWORKS PDM > View Setup
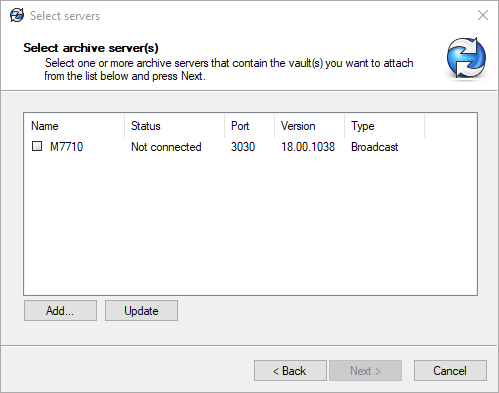
Once started you will be asked which server your PDM Vault is on. In most cases there will just be one server listed.
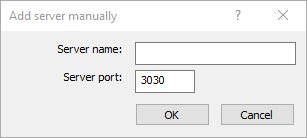
If there isn’t a server listed click ‘Add…’, type in the name of the server hosting the SOLIDWORKS PDM archive, leave the port as 3030 and click ‘OK’.
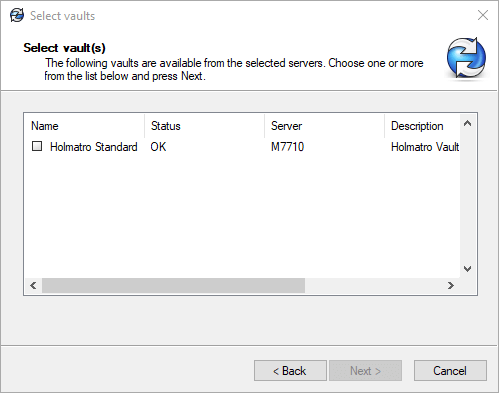
Then you must pick the PDM Vault you want to add on your machine. Again, in most cases there will just be one, although sometimes you may see a testing vault.
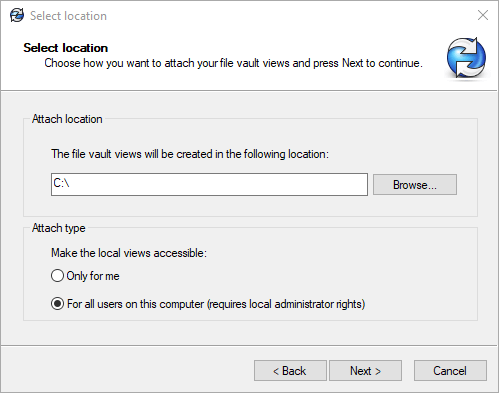
You will then be asked where you want the local view created. We highly recommend the root of your C: drive, although if you have a secondary storage drive then the root of that drive is OK as well.
We recommend putting your vault view in the root of your drive for 2 main reasons;
- It’s easy to find and quicker to browse to
- You don’t want the local view to end up within a My Documents folder which isn’t visible to everybody, and which might not actually be on your computer!
You will also be asked who (which Windows users) should be able to access the local view again we recommend that you select all users (requires local admin rights).
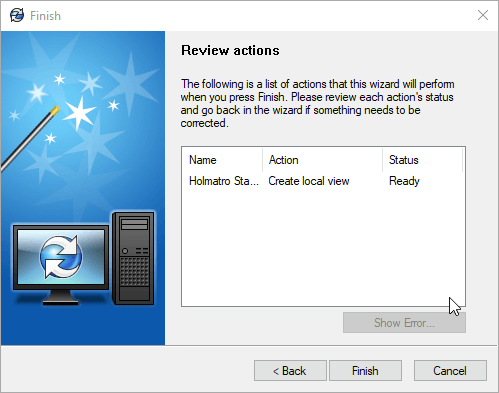
Then click ’Finish‘.
Now we’ve created the local view we need to find it and log in. If you followed our recommendations, the local view will be in the root of the C: Drive.

To access the PDM Vault, double click on the folder with the PDM icon and the login box will pop up. If the login box doesn’t pop up you may have cancelled a previous login attempt in this case right click on the vault icon and choose login.
Enter your username and password. These will either have been given to you by your PDM administrator or if you have PDM Professional these may be your windows username and password.
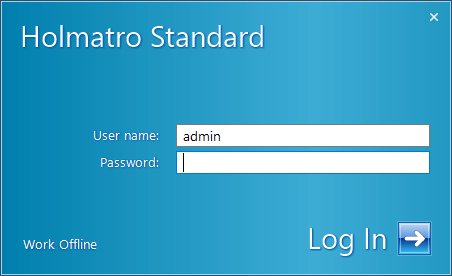
Click the arrow button and we’re in!
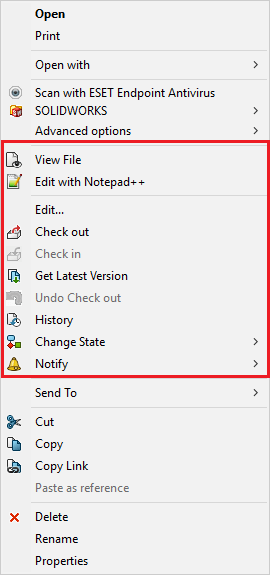
To navigate, simply treat it like you would any other Windows Explorer folder. Double click a file or folder to open it and right click them to see further options, the top and bottom of the right click menu will be familiar and the PDM options appear in the middle.
There are several tabs in the lower half of the screen (“Preview” through to “Where used”) and each of these tabs will display information on the currently selected file or folder.

Check out this video for more information on the SOLIDWORKS PDM User Interface.
We hope you found that useful!
Have you seen our blog archive where we have posted plenty of helpful articles? We also have a fantastic video library filled with easy-to-follow videos on a number of topics inspired by other SOLIDWORKS users – take a look. Also, don’t forget to follow Innova Systems on Twitter for daily bite size SOLIDWORKS tips, tricks and videos.


